This tutorial will show you how to use Elementor Pro and Elementor Custom Skin to create a custom shop archive page or section.
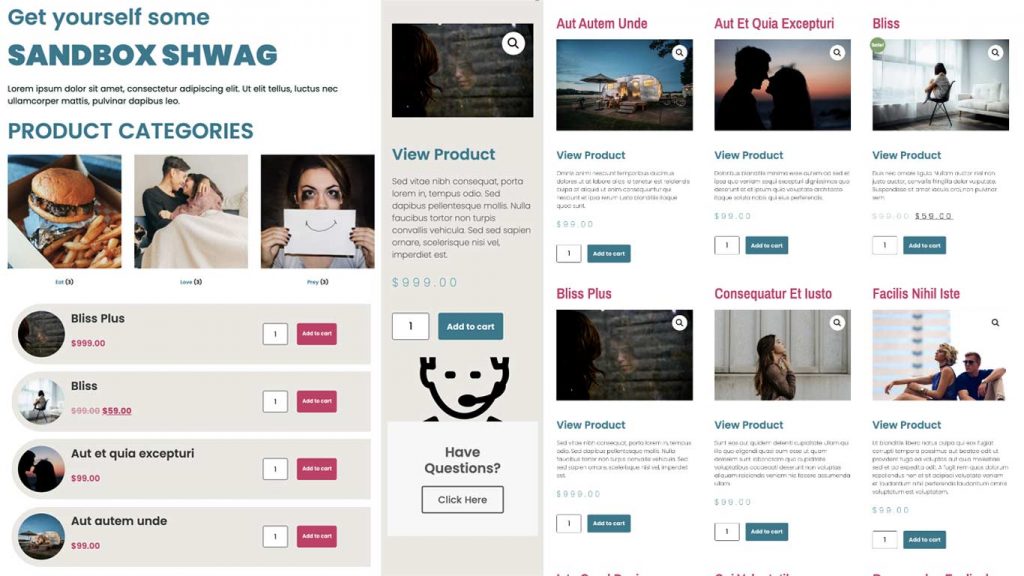
Our Goal
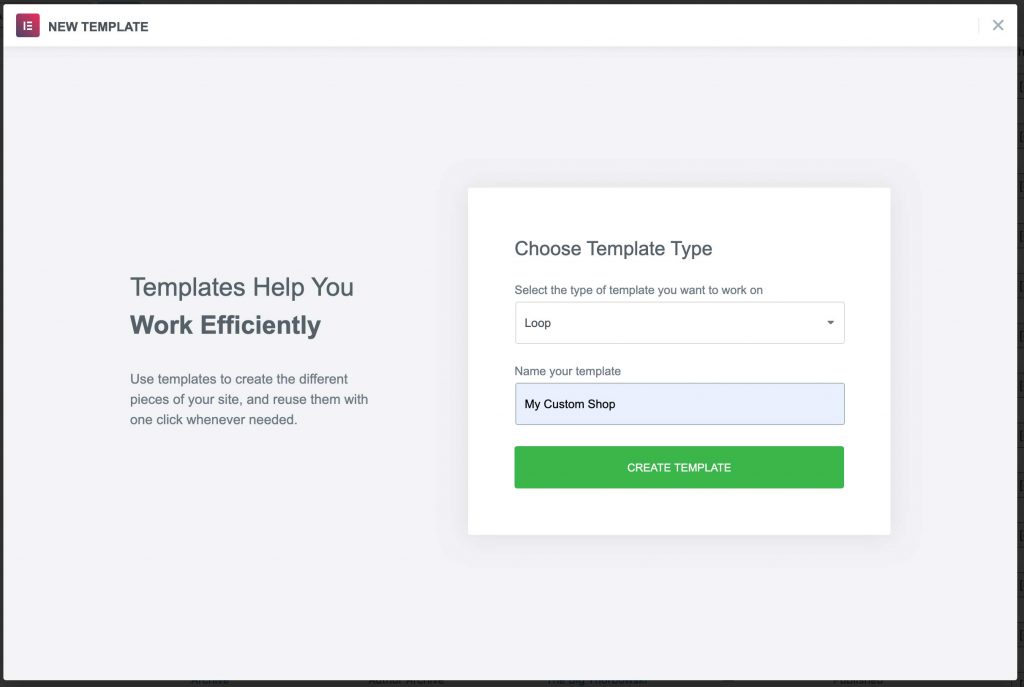
Step One
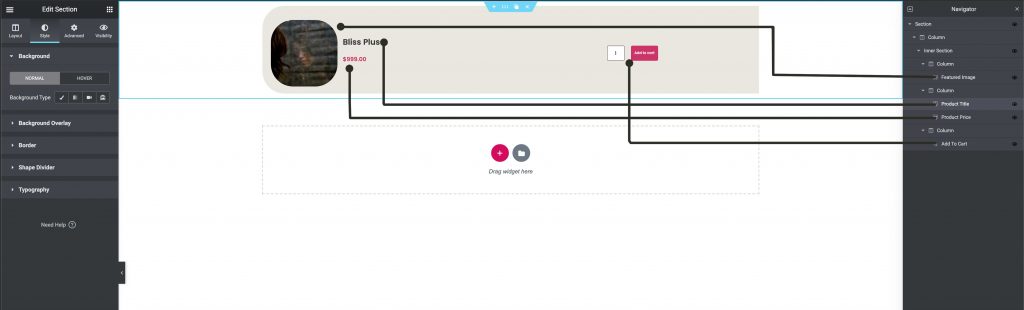
First, we will create a new Loop template using Elementor Custom Skin. We select Loop from our Theme Builder and name it.
Step Two
Next, we will add all of the elements we would like to display using the Elementor WooCommerce widgets. This is similar to creating any single product template.
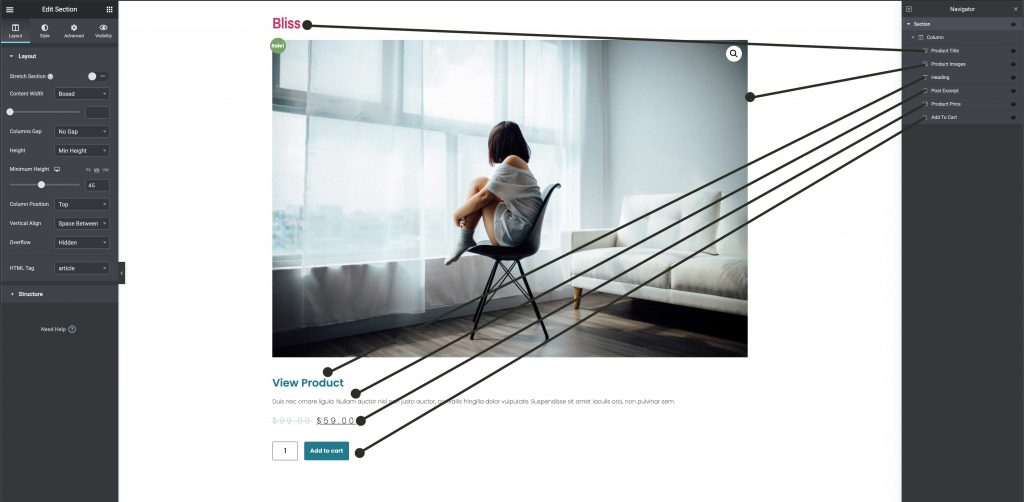
After adding all needed elements to your loop, save and publish, You do not need to set any display conditions for this template. Click the Save And Close button.
Step Three
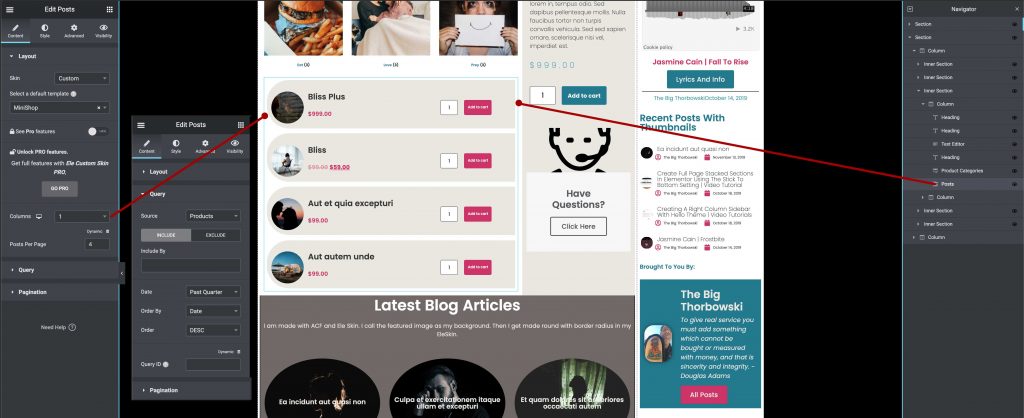
We can now add this new loop to our page. Normally to display products, we would use a product or WooCommerce widget. Since this is not compatible with Elementor Custom Skin, we must use a Post widget instead.
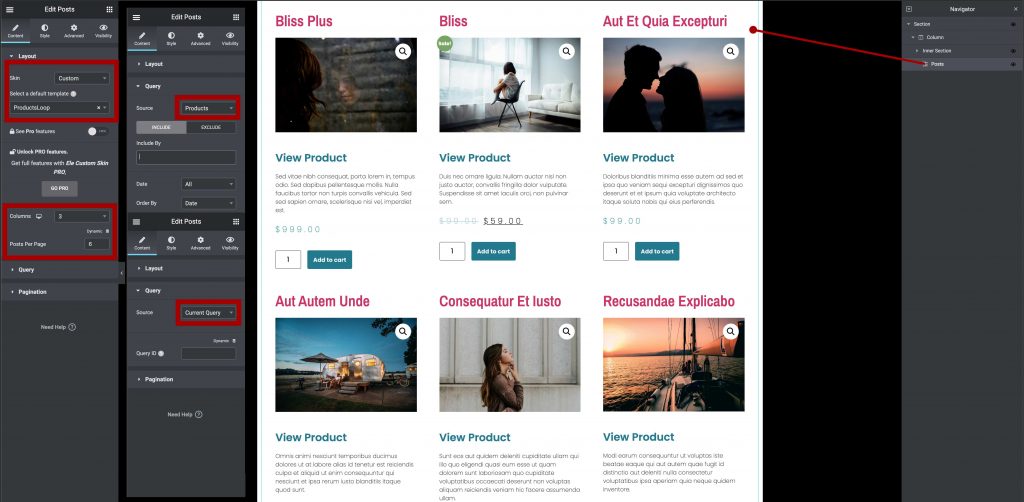
Here we have added the Post widget to our page or archive. For the layout, we select custom and then select the loop we created from the dropdown. We also use the query section and select products rather than posts. If you have placed this onto your Woocommerce archive template, then choose the “current query” option. If you have placed this on your home or another page, choose the “Products” option.
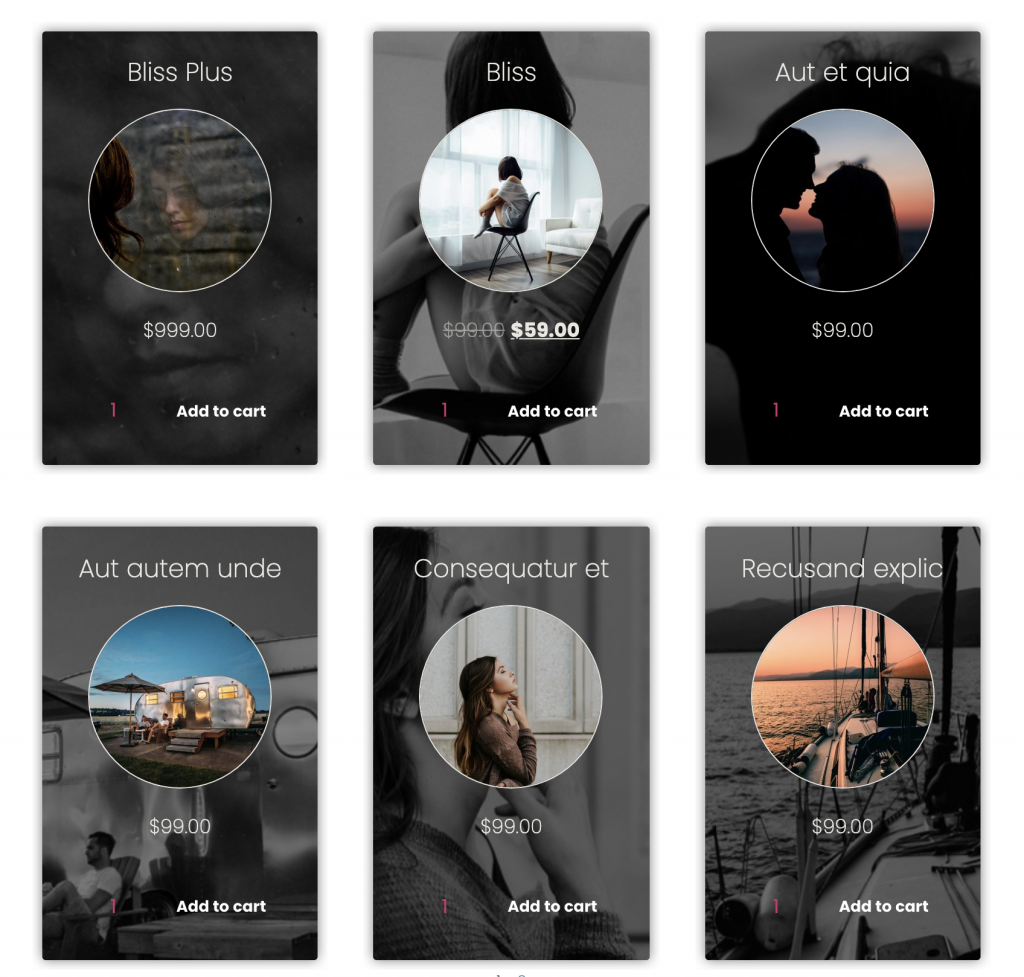
Additional Layouts
We may also create additional loops for displaying lists or products and more.
Summary
We hope this tutorial can help you to create better looking WooCommerce shops with the power of Elementor and Elementor Custom Skin.
