Dynamic colors are now very simple to achieve. With Elementor Pro 2.9, we now have the ability to create a dynamic custom pallet for each post or page rather than needing to create multiple templates or allowing our authors to customize each post.
This is done by using the Advanced Custom Fields plugin.
Step One: Create The Custom Fields
Here I have made three custom fields. One for headings, text, and background. For the field type, choose the color picker. Set the default colors to match your global theme styles.

The following image shows how these fields show up to the post author.

Step Two: Create A New Post
I have now created a new post and selected my new ACF color fields over on the right side. This may show up on the bottom for pages in my current testing.

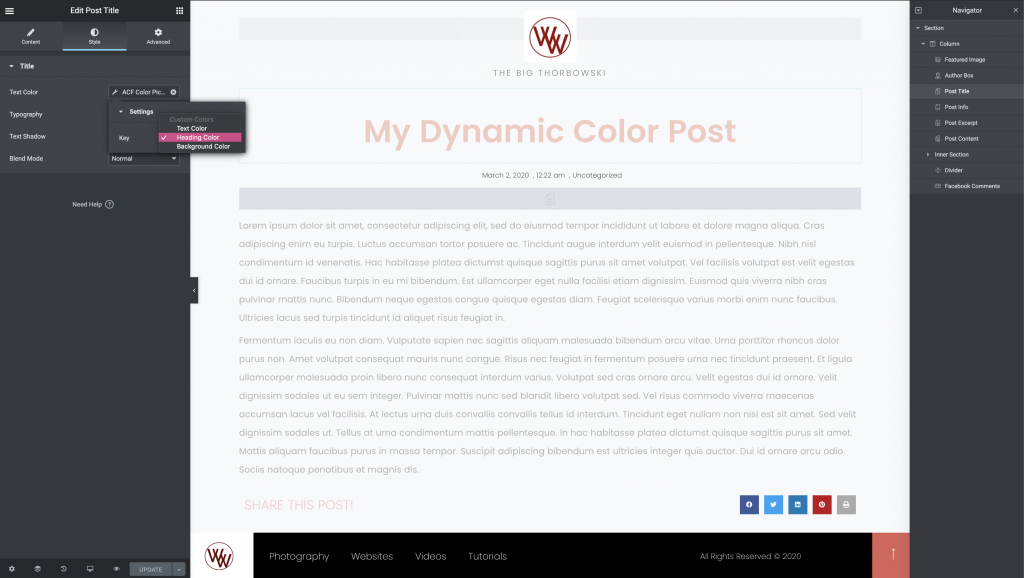
Step Three: Create A Single Post Template
Now we need to create a single post template for our posts. For each area, we want to control with our custom field, we select that from the dynamic options. Publish your template and set the conditions as needed.
Step Four: View Our New Post
Here you can see I have my new dynamic color post with the colors I chose for this post. I can edit these by just editing the post, not the Elementor template.

Step Five: Create Another New Post
I can now create another new post with a new color pallet. I will do this one in grey and red.

Step Six: View Our Second Post

This example I have used here is for a large background. The steps can also used to create smaller custom call-to-action and other elements on our single post type.
Additionally, it can be useful if the default featured image does not look good with the global color settings.
The future is very colorful with dynamic colors and Elementor Pro 2.9.